Introduction
In this blog post, we are going to discuss some essential considerations for creating complex applications with Lightning Web Components, effective ways of communicating between components, and harnessing the power of modern JavaScript features to facilitate the state handling of these applications.
Tackling Complex Applications
The complexity of applications becomes apparent across their various layers. More intricate actions require robust solutions to enhance the user experience and mitigate errors. For example, if you need to provide support to users, enabling them to complete difficult activities, and handle large quantities of information, you will need an application with a smooth user interface that reduces the likelihood of errors in data entry.
First and foremost, before starting to build an application, take some time to decide which tool you are going to use to create it. Here are some key suggestions for tackling complex apps.
When to Use Lightning Web Components
For simple interactions and data manipulations, try to use Screen Flows whenever possible. You can also use Screen Flows in combination with Lightning web components and Apex to perform complex calculations when you have fewer than 3 steps or screens.
If you have more than 4 steps, it may be difficult for a user to interact with the UI. It is important to provide context to the user about the expected result, help them remember their inputs, and empower them with a feeling of control over their actions. The ‘next’ and ‘previous’ navigation options in screen flows may not be the optimal choice for this scenario. In such cases, it is recommended to develop a Lightning Web Components application.
Considerations for Building Complex LWC Apps
Simplify the Markup
When building components, varying aspects can differ in complexity. To efficiently arrange the on-screen elements and make the UI consistent with the rest of the platform, use built-in components and the Lightning Design System. One inconvenience of this is all of the class names and properties written in the HTML to achieve responsive designs.
.png)
.png)
The more markup you add, the more difficult it will be to understand and to visualize the essential structure of your view. To address this and reduce the amount of markup, you can create separate components that are in charge of the distribution of elements, and use slots to name different placeholders.
The example images above show how the Card component works. You can create your own templates defining named placeholders, and configure headers, sidebars, and footers.
Leverage Modern JavaScript
Another point of consideration is the behavior of the application. How should the UI respond, and what feedback will you provide the user? You will need to manage validation and error handling, perhaps with animations or displaying dynamic content, to give them a sense of control and make them feel confident when interacting with the different inputs.
To handle the complicated logic, you can leverage the power of modern Javascript features. Most of the features are available as long as your browser supports them, but you can check the official documentation to see all the options and how to use them.
Here are some of the most useful:
- Object and array destructuring
- Optional Chaining
- Spread Operator
- Arrow functions
- Lexical “this”
- Modules
- Mixins
Nonetheless, we strongly encourage you to take advantage of the official documentation resource to delve further into the various features. Learning about them and effectively sharing this knowledge with your team will help you build an improved, standardized, and easy-to-read code base.
Master State Management
The state of an application can be described by a set of properties that determine how the view looks like in a particular moment, and can also refer to the results of the actions the user has performed.
The challenge of the state management of an application comes when you have to divide your solution into multiple units or components. You will need to communicate between those different components to allow the data to flow.
Here are the different mechanisms for sending data between components when using LWC:

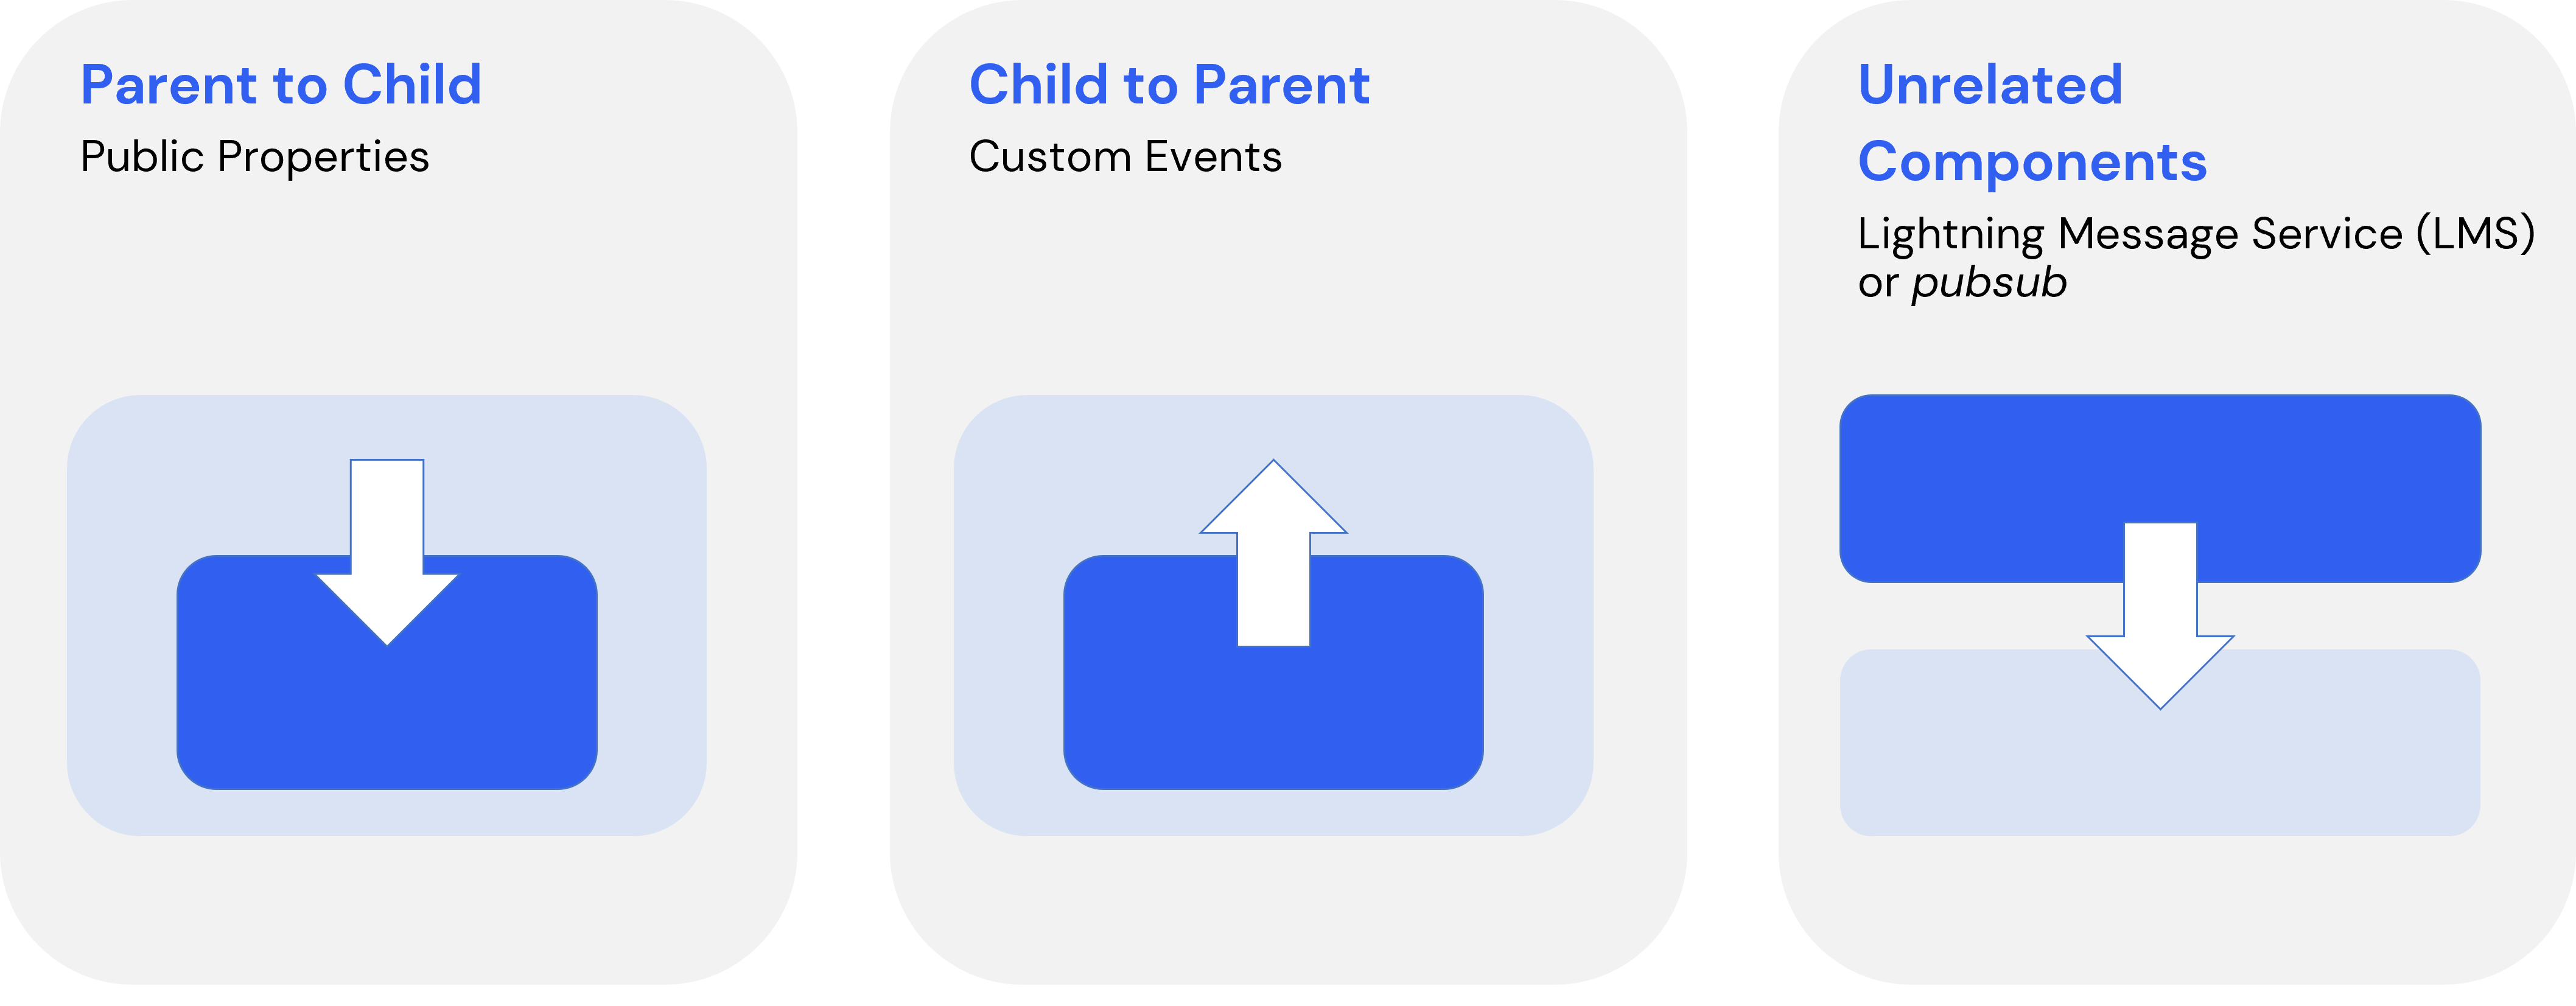
If you need to send data from parent to child, you will use Public Properties. In the child to parent direction, you will use Custom Events, and to send messages between unrelated components you will use Lightning Message Service. This powerful feature allows you to communicate securely across the page, using a publish-subscribe model to send data to aura components, Visualforce pages, or components inside utility bar items. Alternatively, if you can wrap the siblings in a parent component, usually called a container, you will be able to use a combination of Public Properties and Custom Events. The downside is that you will need to write a lot of code to dispatch the events, then add multiple event listeners and write the logic of the event handlers.
Design Patterns for State Management
To encapsulate the communication logic and make it easier to understand and implement state management, we can apply the concepts of some well-known design patterns.
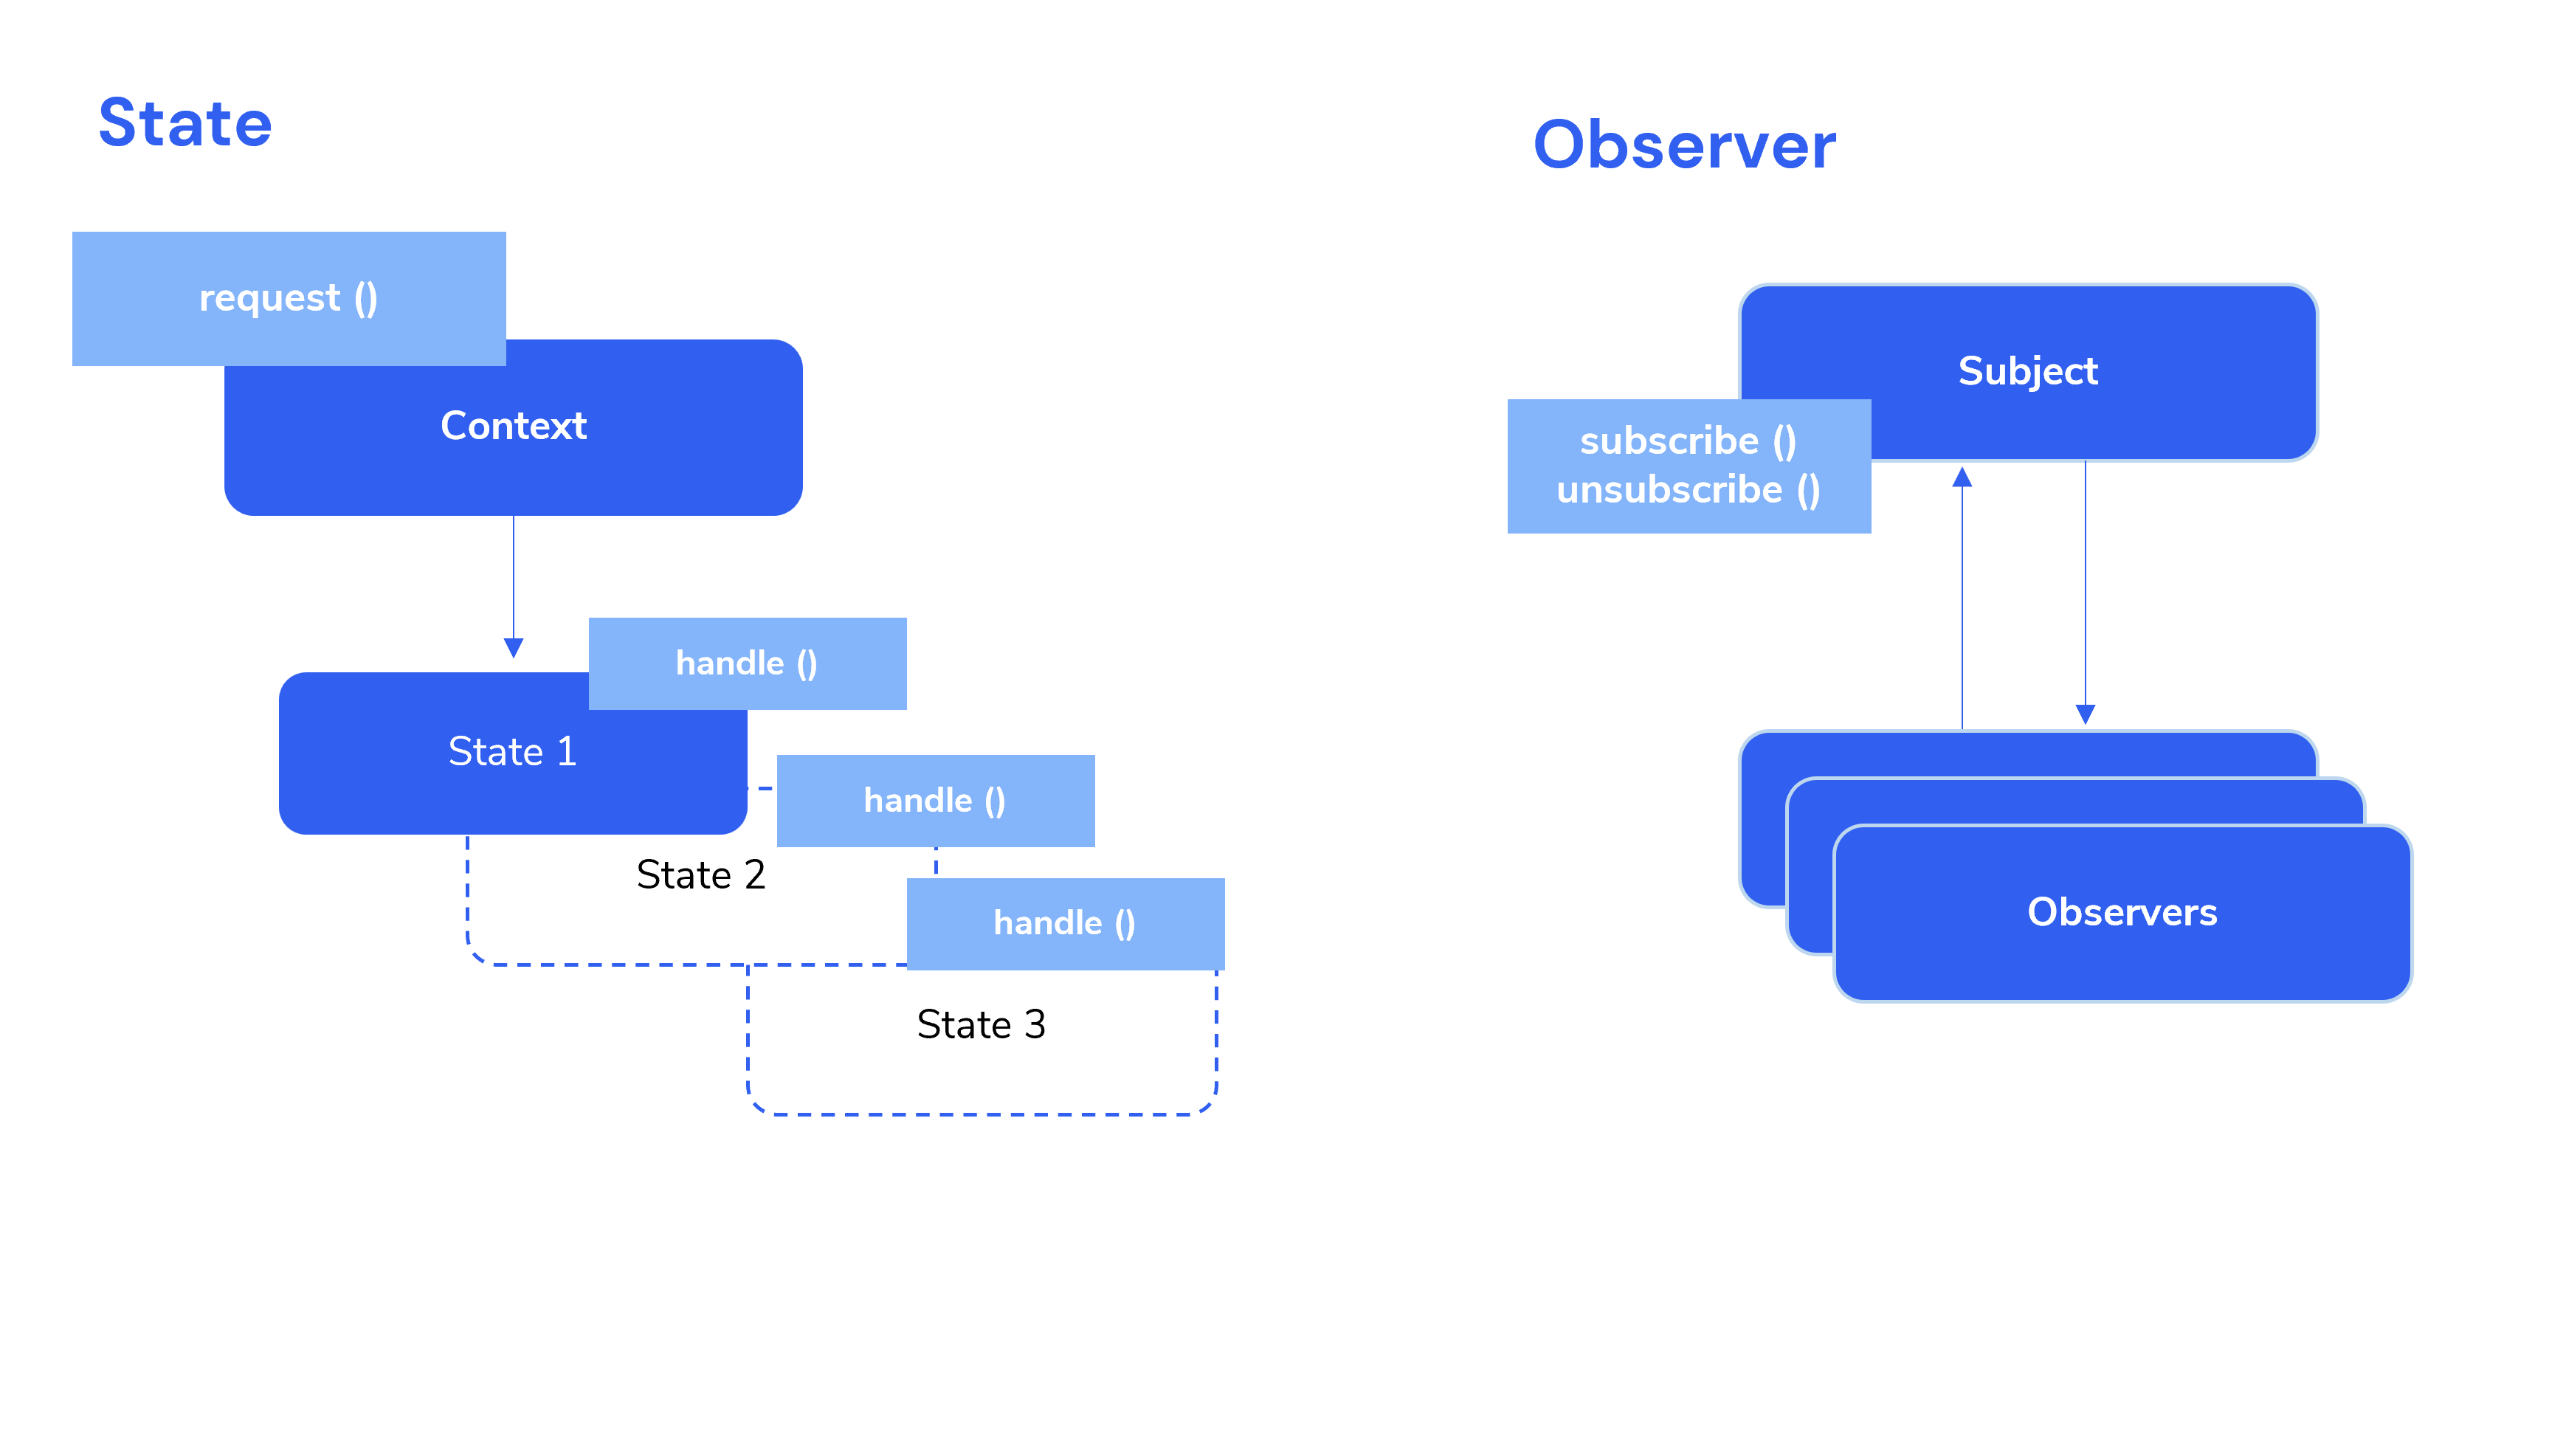
To store the data, following the State pattern, we can create an object called “context”, and then each child could receive a portion of this object, or even the whole context. In React JS for example, you have the useContext hook, in which you can define a provider of the context and multiple consumers, to share data inside a component hierarchy.

With this in mind, and the usage of the Observer pattern to subscribe to different events and to move data around, we have created a JavaScript module (LWC Context) to help manage the state of an LWC application. Writing less boilerplate code and following some conventions instead of configurations accelerates the process of creating complex and dynamic functionalities.
LWC Context
The module uses a couple of helper classes that handle the heavy lifting of communication, leveraging the usefulness of mixins to extend the component’s capabilities with intuitive syntax.
When used to handle the state, we define the provider by extending our container component with the mixin, in the same way we use a navigation mixin. If we don't use a connected callback hook in the container, the provider class will automatically register the event listeners for us.
Then we use the mixin the same way on each consumer and use the updateContext function with one object.
The customer can receive optional updates from the rest of the application, without the parent passing on the properties. In the connected callback, invoke: this.useContext() to apply the latest changes to a specific context and subscribe to its properties. Then, as the callbacks inject those properties into your component, they will reactively re-render your UI as data changes and updates. This works great with a @wire adapter.
.png)
The provider will set event listeners to watch for subscribers and listen to context updates. Use a single event name to send the different packages of information from the children. The consumer can subscribe to updates if desired, and send updates themselves by dispatching an event with the same name previously defined in the provider. This removes the need to create multiple event names throughout the application, since we only need to send data inside a package. Another helpful convention is that the keywords used in the details of an object become or replace the existing provider properties.
Summary
Using Lightning Web Components to build complex applications brings you these benefits:
- Conventions remove complexity and reduce the lines of code.
- Encapsulated and centralized features allow extending features without modifying all the dependencies.
- Consistent state management enables diverse possibilities.
You can find the source code in our GitHub repository. If you have any questions, please contact us.

.png)


